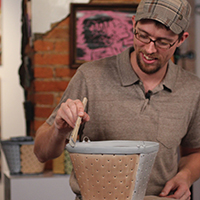
Watch Preview:
Personalize your Texture
Getting Familiar with Photoshop and Cricut®
Making Templates with Ease
Slab-Built Mug with Custom Texture
Total runtime: 1 hour, 3 minutes
About the Author
Unfamiliar with any terms in this video? Browse our glossary of pottery terms!
CLAYflicks Video Topics
Beginner Pottery Techniques
Intermediate Pottery Techniques
Advanced Pottery Techniques
Ceramic Decorating Techniques
Ceramic Glazing Techniques
Ceramic Kilns
Ceramic Sculpture
Glaze Chemistry
Handbuilding Techniques
Making Ceramic Molds
Wheel Throwing Techniques
Interviews & Conversations
QUICKflicks
Sights & Ceramics™
Studio Business
Studio Tours
Talking Clay™
Workshop from Home™
“Wow. [The Stroke and The Splash] is such an informative and helpful video. As usual, professional and well thought out demonstrations by Mr. Scott. This video alone is worth the price of my CLAYflicks membership.” -William
“I’m not a total beginner but I learned several techniques that I plan to implement.” -Kathleen
“OMG! This is fantastic! Mel [Griffin], you are such a good teacher and are so fun! I love the gestural impressions around the drawing. Mel’s tips while drawing are so helpful. Thanks, Mel!” -Beverly
“Merci beaucoup pour tout ce partage de techniques et de conseil!!! [Thank you very much for all this sharing of techniques and advice!!!]” -Suarez
“Great. I love it. So much to learn in a short and beautifully presented clip.” -ADI
“These conversational workshops mixed with handling and demonstration were magical to watch and truly inspirational. It’s wonderful that they have been recorded for us to watch via clay flicks. Thank you so much.” -Joanna
“The videos are an excellent way to bring out more creativity that I feel I sometimes lack. Love, love, love watching and learning from such patient teachers in the videos” -anonymous
“Thank you very much for this tutorial. Sam [Scott]’s instructions and considerations are so generous and obviously developed through a lot of experience. I really appreciate how explains the “why” of his various processes.” -Kathleen
“Keep doing them (videos). I can’t get anything like them in Australia and I have learned so much! -LM, Australia
“Whether you are a new potter or a seasoned one, there is information for everyone.” -M
“For me your videos have been extremely valuable! My minor in college was ceramics, but we didn’t learn anything like what I’m getting out of the videos! So keep them coming.” -KLI
“All together charming!” -TG, Arizona
“Worth every penny! Lots of great “small gifts” of technique and details of finishing a piece to make it look professionally done.” -MB, South Carolina
“Keep on doing what you’re doing with encouraging a variety of ceramic artists to share their knowledge via your video productions…and I’ll keep enjoying & adding to my library of your videos. You’re doing great!” -KIB. Washington
“We want more. It’s so good!” -M, France, Cannes
“The level of difficulty in the video was what I expected, and then some. Some was a challenge which is what I wanted. I wanted to learn something completely new and this was the perfect answer.” -KHB, California
“Very inspiring. Techniques were demonstrated clearly. I’ve already incorporated some of them in my work.” -Angela. NY


Leave a comment